My Best Side Project
By Eric — — 3 minute readAfter a few years working on it, I can say that the "magic mirror" I built with my son has been the best for-fun side project I've ever done. When I was describing the idea, my wife was hesitant about letting me hang it on the wall -- mostly due to my lack of carpentry skills. But after building it, and numerous tweaks to the functionality as inspiration hit, it has become a significant fixture of our home.
Physical build
The heart of the mirror is an old HP monitor, while the brains are a Raspberry Pi Model 2. Fortunately, the monitor has powered USB ports, so the Pi uses one of those and there is just a single power cord for the monitor that powers the whole thing.
My son and I removed all the plastic casing around the monitor since that would be replaced with a nice wooden enclosure. When I say "nice", that's pretty generous, given my afore-mentioned lack of skills (and tools). Fortunately a box is one of the simpler things you can make, and we even got the guy at the hardware store where we bought the wood to cut it to the right lengths for us. The front bezel has 45-degree cuts to make a rectangular frame that holds stuff in. With lots of sanding and some stain, it looks good enough that my wife isn't totally embarrassed by it.
I got the two-way mirror from Sawyer Glass in Salt Lake City. They were happy to cut it to the exact dimensions I needed, but it wasn't cheap -- about $100 for a 15" x 22 5/8" pane. I'm sure similar glass stores around can do the same. There are also places to order the mirror online, but the shipping was nearly as much as the mirror itself at the places I looked at.
Here's a picture of the guts:
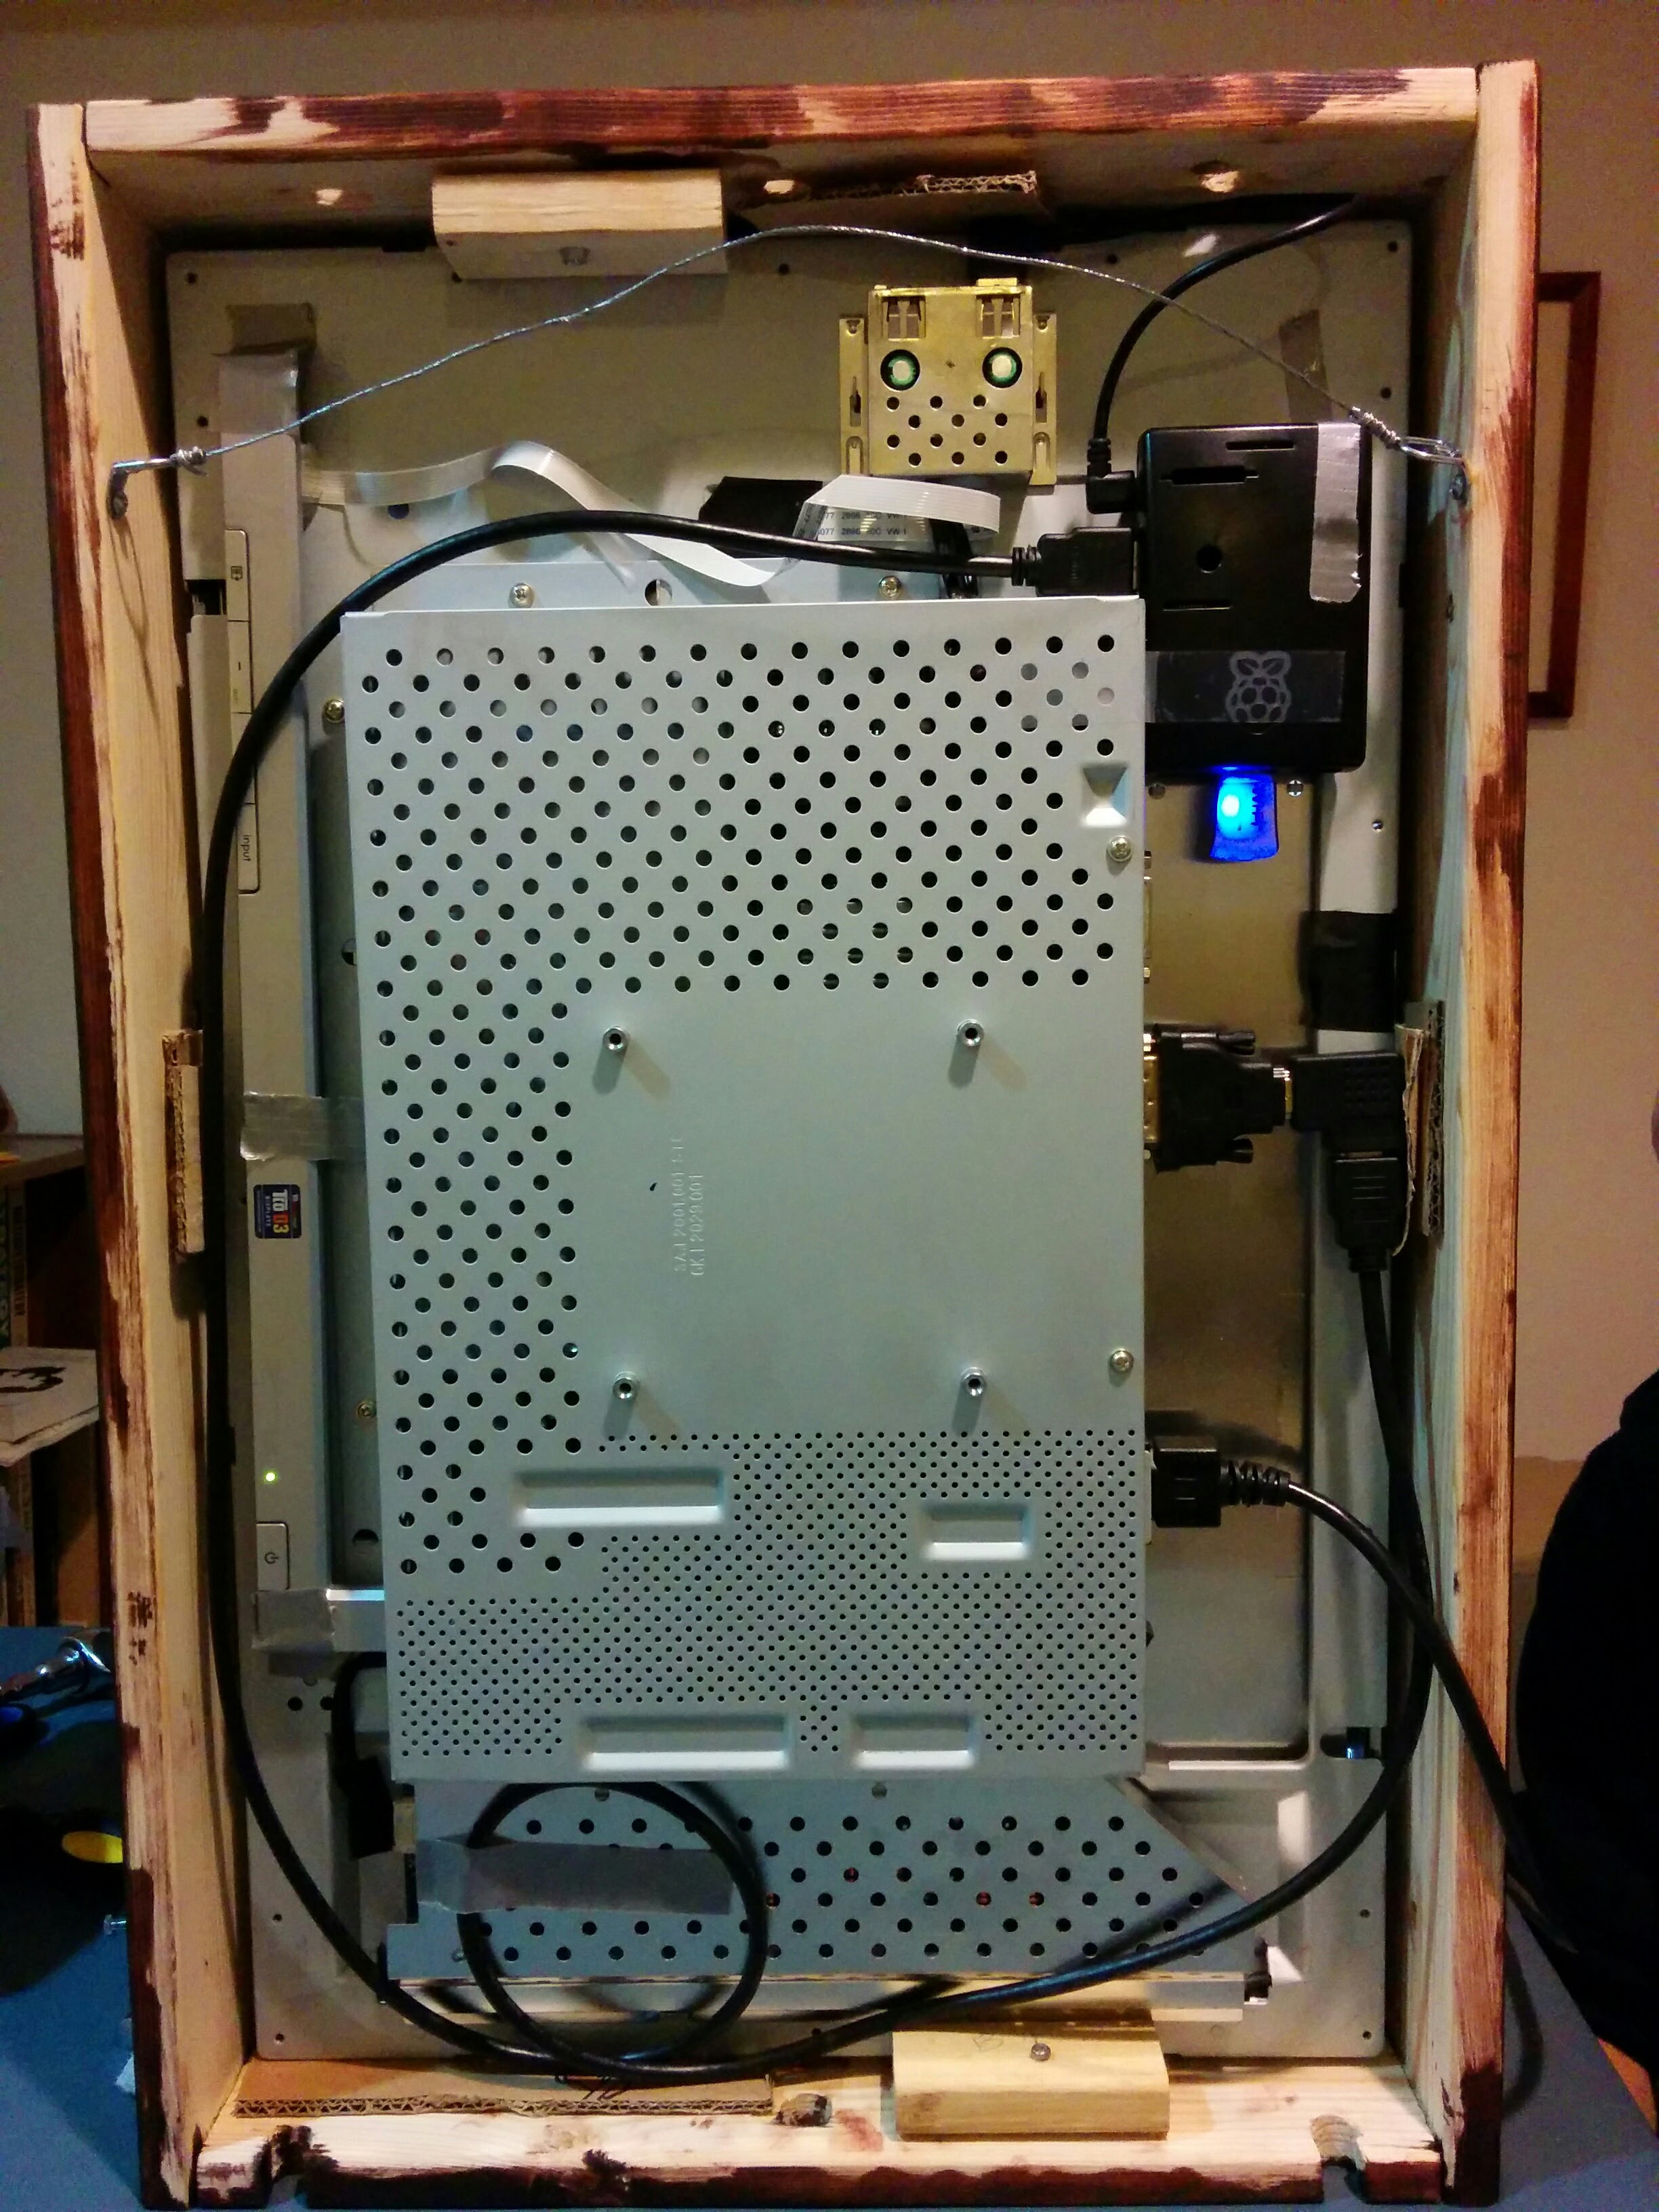
Note the tasteful use of duct tape and cardboard to hold things together -- but nobody sees that part (unless they're really curious).
Tip: Notice the plastic control panel for the monitor on the left side. This doesn't need to be accessible, but it does need to be present. My son and I accidentally ripped the ribbon cable off when disassembling the monitor case, and it took some skilled soldering by a friend to get it reattached so we could power the monitor on. With the panel connected, just plugging in the monitor powers it up.
Tip: If you see a rainbow colored square when booting a Raspberry Pi, it means that the device isn't getting enough power. Maybe try a different/better micro-USB cable.
Software
The Raspberry Pi runs a Python web server (using Flask) that fetches data from various sources, and the UI is the Chromium web browser running in full-screen mode hitting the web server. The widgets in the UI are built using Riot.js. Riot is certainly not as hip as React or Vue, but it is simple, and I've really liked it for this project.
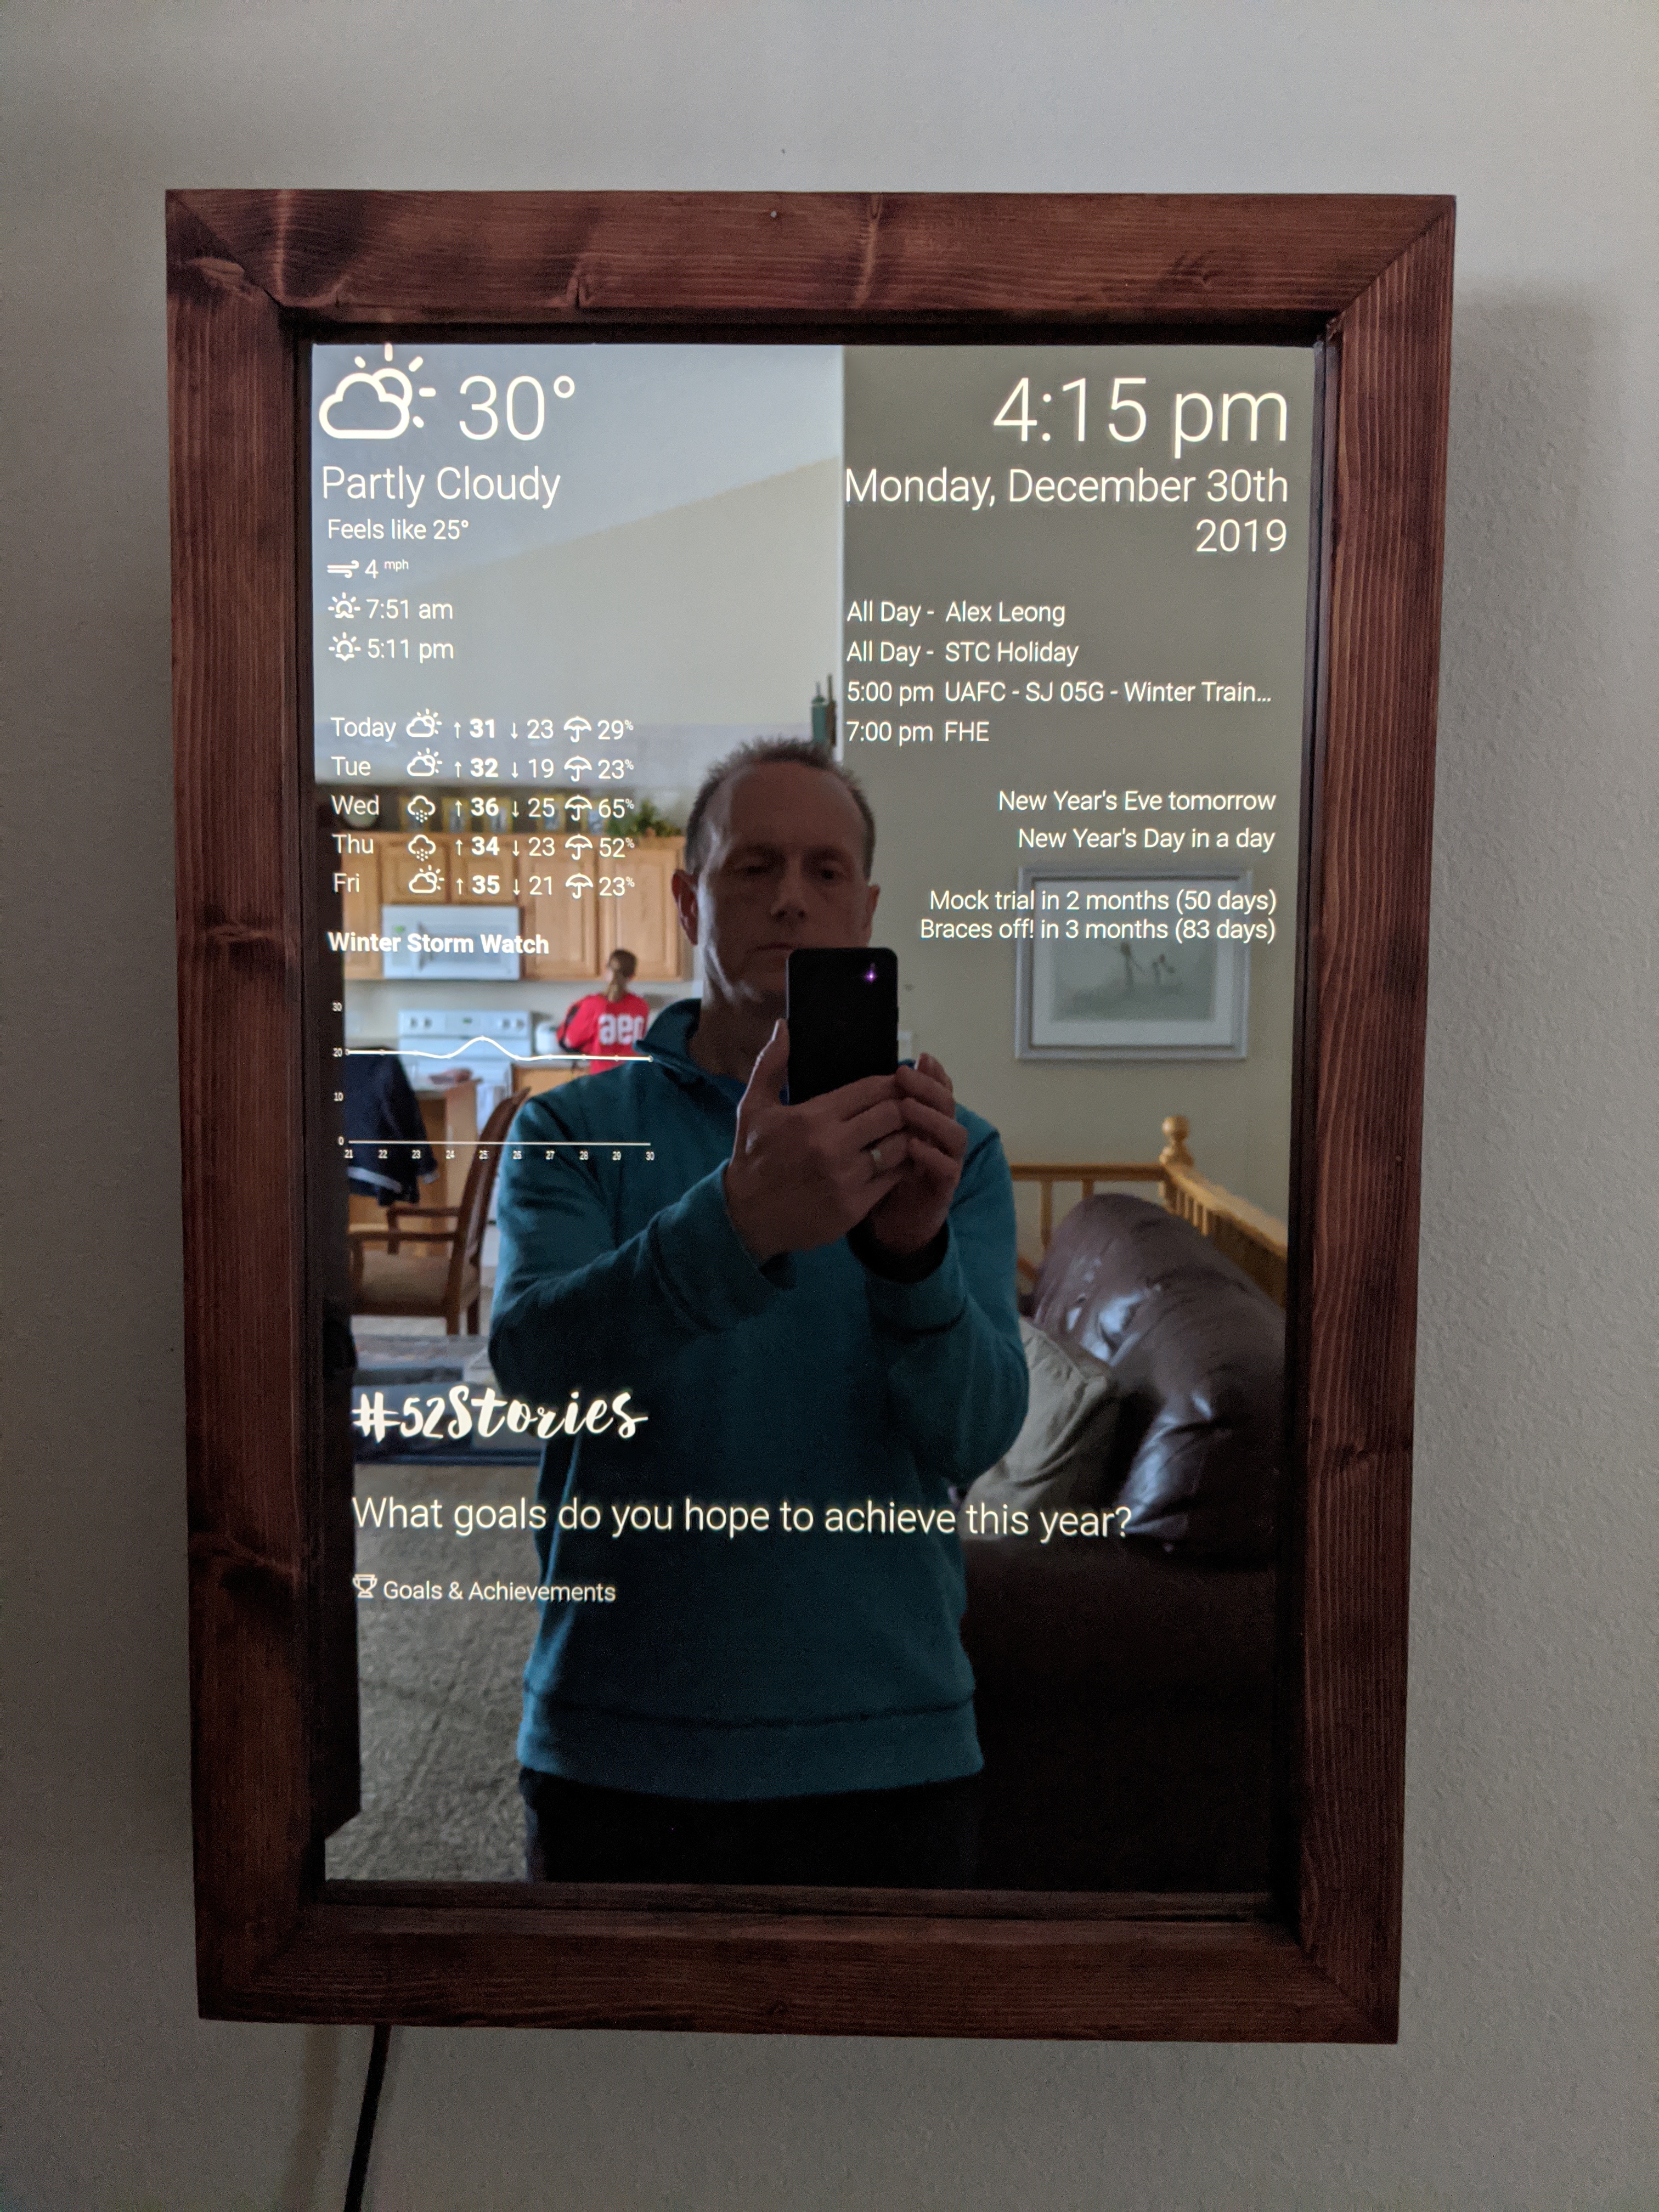
Once the initial build was done, the application is where I've spent the remaining time. Current features include:
- Current weather
- Five-day weather forecast
- Weather alerts
- A graph of some bank data
- Time and date
- Today's agenda items pulled from Google Calendar
- Upcoming all-day events
- Further out events marked for countdown
- Some inspiration
The source for the application, as well as setup instructions, are available on GitHub. If you're less of a software DIY person, there's also a magic mirror framework that someone else has made with tons of widgets. For me, though, building the application is where the fun is, so I like to do it myself.